

Jeroen Rikhof
Read all my blogs This week’s blog is about SAP Mobility. Mobility is hot and many organisations are experimenting or even implementing mobile solutions for their enterprise users. With the new OData features in SUP 2.0 it has become easy to expose your SAP data to mobile devices. In this blog we will show you the steps needed to make connection through SUP with a Netweaver Gateway OData service.
In this blog I will show how to setup Sybase Unwired Platform to accept clients making OData requests to Netweaver Gateway. Also how to setup the reference application to test your setup.
Setting up Sybase Unwired Platform
For this blog we’re going to use the demo SAP Netweaver Gateway provided by SAP (ES Workplace) . You have to create an ES Workplace user account, because SUP doesn’t like the default given username with the @ sign in it.
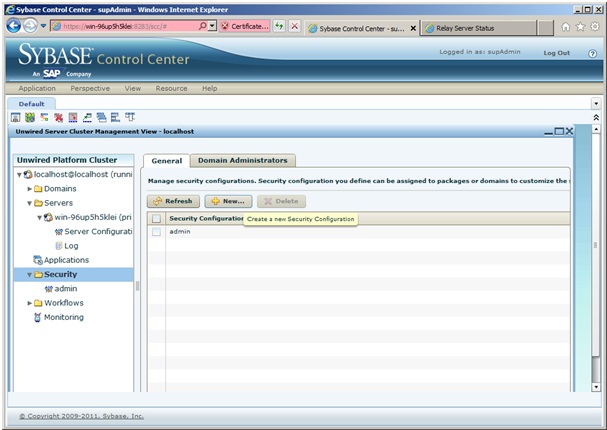
Then login to the Sybase Control Center and go to the security tab. Start by creating a new security profile. Just press new and give it a name. No additional settings required here. Tightening security is is important, but will not be handled in this blog. When using the default admin security profile you might get authorisation errors.

After creating the security profile we can create an application. This will also create an application connection profile. Go to the application tab en press new.


The “Application ID” is the ID the mobile client uses to identify the application. Select the security profile we just created and select the domain. Note that also the “Configure additional settings” is checked, so we can also set the defaults for server name, port number and relay server URL suffix if using a relay server.

Under the proxy tab we set the gateway endpoint. We will use the CRM demo service. When a client connects, this parameter will be given to the client. Under the “Device Advanced” tab you can set the relay server URL suffix, if using a relay server in your setup.

From this point all SUP proxy settings are done. Easy isn’t it? Next we will create an user.
Adding users to the application
Go to the “Application Connections” tab en press the register button. Fill in a user name en select the Application connection template we just created. Make sure the server name, port and Farm ID is correct. Also set a activation code and we are ready to go. Next configuring a mobile iOS client.


Setup the iOS reference application
To setup a iOS client we use a couple of things. First we need to download the reference application which you can find here:
ODP-reference iOS app available @ https://cw.sdn.sap.com/cw/docs/DOC-146461
ODP-reference BB app available @ https://cw.sdn.sap.com/cw/docs/DOC-146459
ODP-reference Android app available @ https://cw.sdn.sap.com/cw/docs/DOC-146460
The reference application is provided without SUP libraries. So we need to copy these libraries from the SUP server installation. You can find the files in de “SybaseUnwiredPlatformMobileSDKODdata” folder on the SUP server.

Extract the reference application and startup the xcode project.

In the application you will see that the libraries are missing. Just delete this reference that are marked red.
Then copy the includes and libraries folder to the project.
From the build phases settings, fix the missing libz.1.2.3.dylib reference by deleting it an adding the new libz.1.2.5.dylib.


Last setting we need to change is the Application ID that we previous set in the Sybase Control Center. Open the Constants.m file and change kAppID to “ODATA_TEST”. We are done and ready to test the application.

For our test we use the manual setting. Make sure all settings are filled in and press the “Register/Logon” button. When the application is asking to create/unlock the datavault, just press enter to use the defaults. You will get a message that the user is registered succesfully.

Watch the console log in xCode. It will show more output about what is happening in the background. The application will exchange the settings with the SUP server, with these parameters the application can make a request which the SUP server will fire to the gateway service.

If everything goes well you will see in the console log that some data is fetched. Note the last line. From this point you are ready to do custom requests to the Netweaver Gateway service. Take a look at the getMetadataAsync request in the CollectionsListViewController.m how to make a custom request.
Debugging OData & SUP
When having troubles to get it working. You can try to enable extra logging. This will give you more information about the setup and communication with the client. For the proxy we need to set the MMS, Proxy and Other components to log level “DEBUG” and save.

Also enable logging to the proxy. Go to the domain log and create a new log profile. By the connection select the OData connection. After these setting changes, test the application again and see the server log to see the debug output.
Receive our weekly blog by email?
Subscribe here:


4 responses to “Guide to SAP Netweaver Gateway OData & Sybase Unwired Server”
Thanks for the article. Have you considering using this tool?
http://tinyurl.com/sapgwios
I haven't had time to explorer that tool out yet, but from first view that may also work. Thanks for the reminder 🙂
Hello,
I'm a junior SAP Analyst & Developer and I want to specialize in SAP Mobile development
I haven't access to any Sybase Unwired Server nor SAP AS. And I work with android & Eclipse. May I ask if there is a simulation environment that I can use to test the performance of the SAP Mobile Platform & the SYBASE Unwired Platform before starting courses.
Any help is very welcome.
Thank you
Go here for free access:
http://scn.sap.com/community/developer-center/mobility-platform
Have fun 🙂